The Maps Web Part supports both the creation of a new list, directly through its interface, as well as the connection to a pre-existing list.
Create a list
This list is what you will use to store your markers.
-
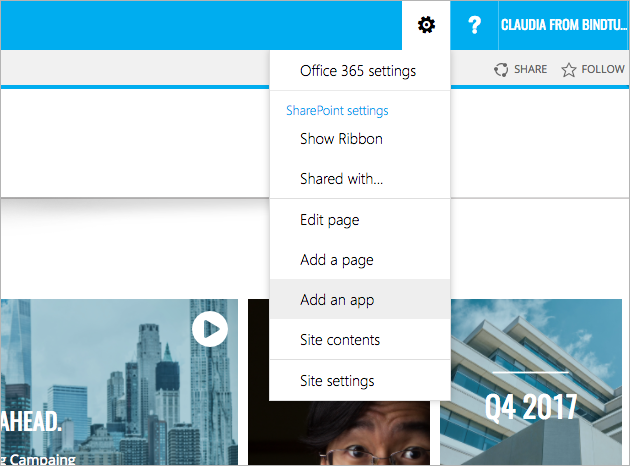
Click on Settings ⚙️ and then on Add an app;
-
On the search box type Maps;
- Look for the Maps list and click to open;
-
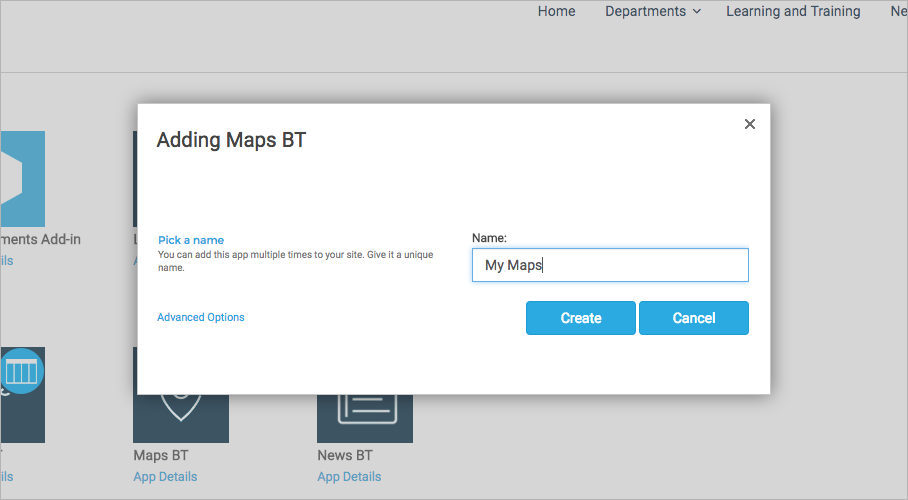
Name the list and click on Create;
-
You've created the list that will contain all the specific fields from this web part.
-
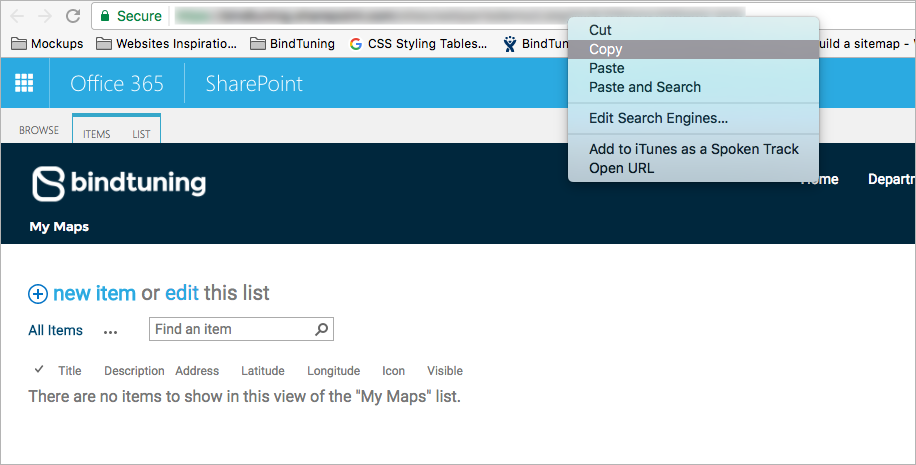
Open the list that you have created, and copy the list URL, you will need it to connect the list and webpart.
Connect to a pre-existing List
The Maps Web Part also allows for the mapping of fields in a pre-existing list to display the information in the Web Part.
To connect to a pre-existing list, follow the steps below:
-
Edit the Maps Web Part;
-
Under Marker Options, select Manage Lists;
-
Click the button Add list;
-
Proceed to input both the SharePoint site and corresponding list you wish to connect to;
-
After selecting the list, map the corresponding list columns to the specified field.
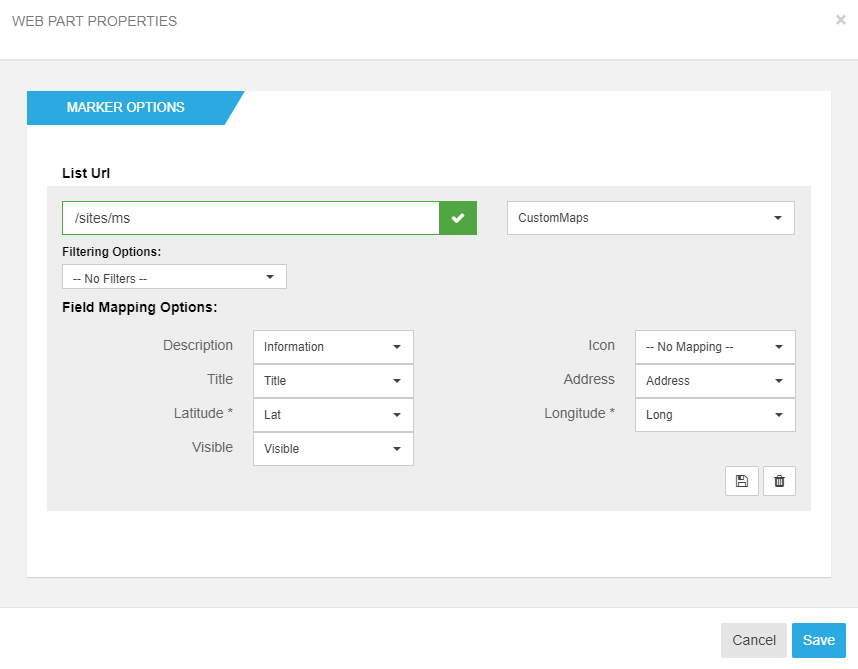
Note that, in order for the mapping to properly work, you'll have to add columns for both Latitude and Longitude to your pre-existing list.
-
Save the configuration.
This mapping functionality will work the same way, regardless of Map Provider, although Google Maps offering a few more capabilities.
Since Google Maps offers geocoding functionalities, both the Latitude and Longitude columns, previously created, can be left empty, as the coordinates will be, automatically, extracted from the provided Address column.
For the Open Street Maps provider, both the Latitude and Longitude columns will have to be manually filled, as it does not offer geocoding functionalities.
List URL
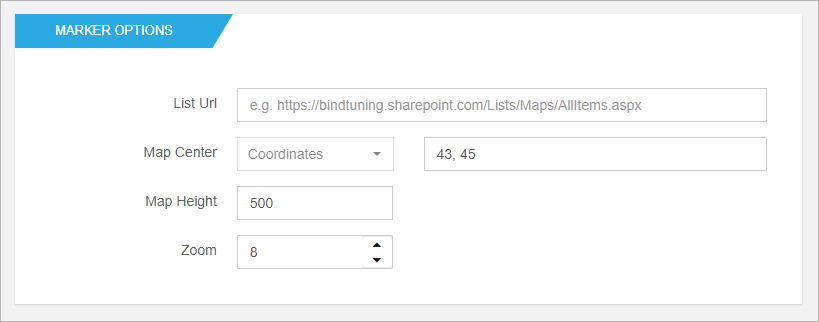
Paste the URL of the SharePoint list you created on step above.
Without the List URL, the web part markers will not be visible.
Use relative paths for this field. So instead of using an URL like https://company.sharepoint.com/sites/Home/Lists/Markers, you should use something like sites/Home/Lists/Markers.
Map Center
Here you can set the location where the map will be centered when it first loads. If you are using Google Maps, you can use an address or coordinates, but if you are using Open Street Maps only the coordinates option is available.
To check the coordinates go to Open Street Maps and search for the City/State. Select the desired address and at your's URL, you'll have the coordinates that you can add to the Map Center.

Coordinates are accepted in decimal degrees format. (Example: 41.368562,-8.7526527). If the value provided is invalid or if you leave this option blank, the web part will use the coordinates (0.00, 0.00).
Map Heigth
The Map Height allows you to adjust the height you want for your map. By default, it’s set to 500px.
Zoom
Here you can set the amount of zoom that will be used when the map first loads. The higher the value, the closer the map will be to the ground. Maximum value is 18. The default value is 5.